I was standing in my kitchen last Tuesday, staring at a jagged, half-finished bead of silicone around my sink that looked more like a pile of spilled toothpaste than a professional seal. I had spent forty minutes trying to get it right, only to end up with a sticky, uneven mess that made me want to throw my caulk gun straight out the window. It’s one of those tasks that feels incredibly intimidating until you realize that learning how to caulk isn’t about having steady hands of a surgeon; it’s actually just about having the right technique and a little bit of patience.
If you’ve ever felt discouraged by a messy seam or wondered if you’re just “not a DIY person,” I promise you, that is a total myth. In this guide, I’m stripping away the jargon to give you the exact, no-nonsense steps I use in my own woodworking and home projects. We’re going to cover everything from picking the right tube to the secret smoothing trick that makes your work look seamless. By the time we’re done, you’ll have the confidence to tackle those gaps and finally level up your home DIY skills.
Table of Contents
Guide Overview
Tools & Supplies
- Caulking gun to apply the sealant
- Caulk removal tool or utility knife to clean old residue
- Microfiber cloth to wipe away excess material
- Painter's tape for clean, straight edges
- Caulk tube (silicone or acrylic based on surface)
- Caulk remover/stripper for old sealant
- Rubbing alcohol to clean the surface before application
Step-by-Step Instructions
- 1. First things first, you’ve got to prep the area. I know, it’s the least glamorous part, but if you try to caulk over old, crusty residue, the new stuff just won’t stick. Grab a putty knife or a specialized caulk removal tool and scrape away every bit of the old sealant. Once that’s done, take a damp cloth or a vacuum to clear out any dust or debris. You want that surface to be completely clean and dry before we move on.
- 2. Next, let’s get our tools ready. Grab your caulk gun and your tube of sealant (make sure you’ve picked the right one for the job—silicone is usually my go-to for bathrooms because it handles moisture like a champ). Before you even think about squeezing the trigger, cut the tip of the tube. Don’t go overboard here; just a small, angled cut is all you need. A 45-degree angle helps you control the flow much better when you’re actually in the zone.
- 3. Now, it’s time for the actual application. Hold your caulk gun at a steady angle and move at a consistent, slow pace along the seam. It’s tempting to rush through it to get it over with, but I’ve learned the hard way that steady pressure is your best friend here. Aim for a continuous bead that fills the gap without leaving huge gaps or massive globs.
- 4. Once you’ve laid down your bead, you need to smooth it out. This is where the magic happens! I like to keep a small bucket of water mixed with a little bit of dish soap nearby. Dip your finger into the soapy water and lightly run it along the bead to shape it. The soap prevents the caulk from sticking to your skin and helps you create that perfectly smooth, professional-looking line we’re all aiming for.
- 5. Don’t overwork it! If you keep swiping at the same spot, you’ll just end up pulling the caulk out of the crack entirely. If you see a little mess, just wipe it up with a damp cloth and try one more gentle pass. Once it looks right, step away and let it cure. Depending on the product, this could take anywhere from a few hours to a full day, so patience is a virtue when you’re working on home improvement projects.
Choosing Your Weapon Silicone vs Acrylic Caulk Explained
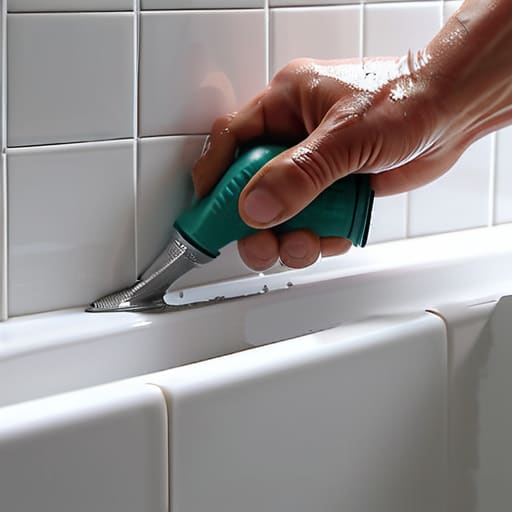
Before you even pick up your caulk gun, you need to know what you’re working with. I used to think all caulk was created equal, but trust me, grabbing the wrong tube can turn a quick weekend fix into a total headache. The big debate is almost always silicone vs acrylic caulk. If you’re tackling high-moisture areas like caulking bathtub seams, silicone is your absolute best friend. It’s incredibly flexible and waterproof, meaning it won’t crack or peel when the temperature shifts or the tub gets filled.
Acrylic, on the other hand, is much more forgiving for beginners. It’s water-based, so it’s easier to clean up with just a damp cloth, and it’s great for trim or baseboards where you might want to paint over it later. Just keep in mind that it isn’t as durable in wet environments. If you’re working on a project that requires a perfectly clean line, remember that your choice of material will dictate how much effort you’ll need to put into smoothing the caulk bead once it’s applied. Pick the right tool for the job, and you’re already halfway there!
The Secret to Perfection Mastering Caulk Gun Usage
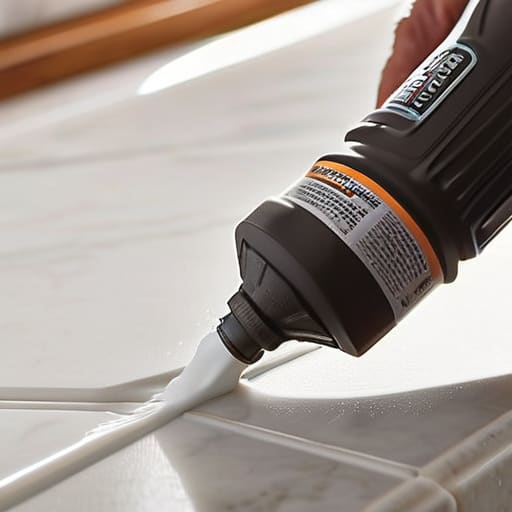
Honestly, I used to think the caulk gun was just a glorified squeeze tube, but I quickly learned that your technique makes or breaks the entire project. If you’ve ever ended up with a huge, uneven glob that looks more like a construction accident than a clean seal, you aren’t alone! The trick to smooth caulk gun usage is all about steady pressure and a consistent pace. Instead of trying to force the bead out in one frantic burst, try to maintain a slow, rhythmic pull. I always tell my mentees—whether they’re debugging code or fixing a kitchen backsplash—that consistency is your best friend.
Once you have the bead laid down, the real magic happens during the smoothing phase. Don’t just wing it; using a dedicated finger or a specialized tool for smoothing caulk bead makes a massive difference. I personally love keeping a small container of soapy water nearby. Dipping your finger in the solution before you glide it along the line prevents the material from sticking to your skin and keeps the finish looking professional. It might feel a little tedious at first, but seeing that perfectly crisp, clean line at the end is incredibly satisfying.
Pro Tips to Save Your Sanity (and Your Seams)
- Cleanliness is everything. Before you even touch that caulk gun, grab a damp rag and make sure the surface is bone-dry and free of old, crusty residue. If you try to caulk over dust or old bits, it’s going to peel off faster than a bad software patch.
- Keep a spray bottle of soapy water handy. Seriously, it’s a game changer. A light mist of water mixed with a tiny drop of dish soap on your finger helps you smooth out those ridges without the caulk sticking to your skin and making a huge mess.
- Don’t overdo the bead. It’s tempting to go big, but a little goes a long way. Aim for a consistent, thin line; you can always add more if you need to, but trying to scrape away a massive, bloated bead of caulk is a nightmare you don’t want.
- Work in small sections. Don’t try to tackle the entire bathtub in one go thinking you’re a superhero. Work in manageable 6-to-12-inch chunks so you have time to smooth it out before the material starts to set up.
- Trust the drying time. I know, I know—you want to see the finished result immediately, but resist the urge to poke at it! Let it cure fully according to the tube’s instructions. If you mess with it too early, you’ll just end up ruining the smooth finish you worked so hard for.
Quick Wins for a Flawless Finish
Pick the right tool for the job—use silicone for those wet, high-moisture areas like tubs, and stick to acrylic for walls where you might need to paint later.
Prep is everything; if your surface isn’t clean and dry, even the most expensive caulk is going to peel off, and we definitely don’t want to be doing this twice.
Slow and steady wins the race—don’t rush the bead, and remember that a little bit of smoothing with a damp finger goes a long way in making those seams look professional.
## The Mindset of a Maker
“I’ve learned that whether you’re debugging a complex piece of code or sealing a gap in your kitchen backsplash, the secret is the same: don’t rush the prep work, and don’t be afraid to wipe it away and start over if it doesn’t look right. Perfection isn’t about being flawless on the first squeeze; it’s about having the patience to get the seal right.”
Sarah Mitchell
Wrapping It All Up
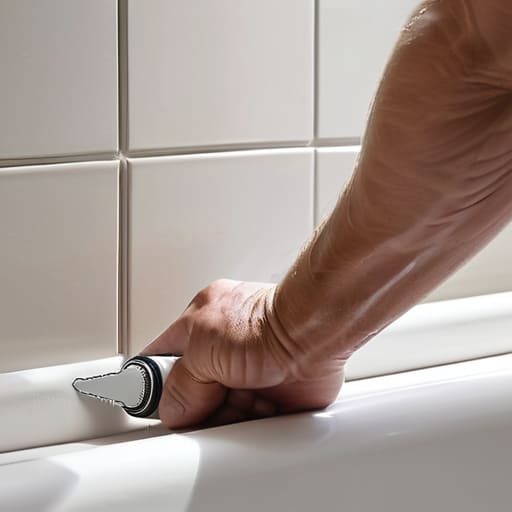
Now that you’ve walked through the process, I hope you feel a lot more confident about tackling that messy gap in your kitchen or bathroom. Just remember the core essentials we covered: picking the right material—whether it’s the flexibility of silicone or the paintability of acrylic—and taking the time to prep your surfaces properly. Most importantly, don’t rush the application. Mastering that caulk gun is all about consistent pressure and steady movement, not speed. If you end up with a little bit of a wobble on your first try, don’t sweat it; even seasoned pros have to wipe away a few mistakes before they get that perfect, seamless line.
At the end of the day, DIY is less about being perfect from the start and more about the satisfaction of saying, “I fixed that myself.” There is something incredibly empowering about taking a tool, learning a new skill, and seeing a tangible improvement in your home. Whether you’re sealing a bathtub or upcycling an old piece of furniture, these small wins build your confidence one project at a time. So, grab your caulk gun, clear off your workbench, and just dive in. I promise that once you see that clean, professional finish, you’ll be hooked on the feeling of total creative control.
Frequently Asked Questions
How do I know if I should scrape out the old, crusty caulk first or just layer the new stuff right on top?
Oh, I’ve been there—staring at a gummy, peeling mess and wondering if I can just “fix” it quickly. Here’s the honest truth: you absolutely have to scrape out the old stuff first. If you layer new caulk over the old, it won’t bond properly, and you’ll be back to square one in a few weeks when it starts peeling again. It’s a bit more tedious upfront, but trust me, it’s the only way to get a professional, lasting seal.
Is there a trick to cleaning the surface so the new bead actually sticks instead of peeling off in a week?
Oh, I’ve been there! There is nothing more frustrating than watching your hard work peel away like a bad sunburn. The secret isn’t actually the caulk—it’s the prep. You have to be ruthless. Scrape out every bit of the old residue, then wipe the area down with isopropyl alcohol. It cuts through those lingering oils and dust that act like a barrier. If the surface isn’t surgically clean, that bond just won’t hold.
What’s the best way to smooth out a messy line if I realize I've gone a little overboard with the application?
Don’t panic—we’ve all been there! If you realize you’ve laid down a bit too much, the best move is to grab a damp rag or a finger dipped in a little soapy water. Gently wipe away the excess before it fully skins over. If it’s already starting to set, just use a putty knife to carefully scrape the bulk of it off, then re-apply a smaller bead. You’ve got this!
