I was standing in my garage last weekend, surrounded by a mountain of scrap wood and a half-finished coffee, staring at a perfectly good cedar plank and wondering why I felt so intimidated. It’s funny—I can debug complex code all day at my desk, but for some reason, the idea of building my own diy planters felt like a massive, daunting hurdle. I kept telling myself I didn’t have the “right” workshop or the fancy power tools you see all over Pinterest, but that’s just a total myth we tell ourselves to stay in our comfort zones.
The truth is, you don’t need a professional-grade studio to create something beautiful and functional for your home. In this guide, I’m stripping away the fluff and giving you the actual, no-nonsense steps to build sturdy, stylish containers without breaking the bank. We’re going to talk about the essential tools you actually need, how to prep your materials so they last, and a few clever ways to upcycle old finds. Whether you’re a total beginner or just looking to sharpen your skills, I’m here to help you build with confidence.
Table of Contents
- Step-by-Step Instructions
- Mastering Upcycled Container Gardening for a Greener Home
- Smart Drainage Solutions for Homemade Pots to Ensure Growth
- Pro-Tips for Making Your DIY Planters Last (and Actually Look Good)
- Quick Wins for Your Next DIY Project
- Why I Love Building My Own Planters
- Bringing It All Home
- Frequently Asked Questions
Guide Overview
Tools & Supplies
- Drill and drill bits for drainage holes
- Measuring tape for accurate sizing
- Sandpaper to smooth rough edges
- Upcycled containers (tin cans, wooden crates, or plastic buckets)
- Potting soil (1 bag)
- Small stones or gravel for drainage layer
- Paint or sealant for decoration
Step-by-Step Instructions
- 1. First things first, you’ve got to gather your gear. Since I usually dive into these projects in my garage, I like to have everything laid out on my workbench before I even start. You’ll need some basic woodworking tools—think a drill, some sandpaper, and a measuring tape—along with your primary material, which could be reclaimed wood from an old pallet or even some sturdy cedar. Don’t forget to grab a few essential hardware items like wood screws and some waterproof sealant to make sure your hard work lasts through the watering cycles.
- 2. Once you’re geared up, it’s time to measure and cut. This is where that precision I learned back in my CS days really comes in handy; if your measurements are off by even a tiny bit, nothing will line up later. Map out your dimensions on your wood and use a saw to cut your pieces to size. I always recommend double-checking your angles before you make the final cut, because it’s much easier to fix a pencil mark than it is to fix a miscut piece of timber.
- 3. Now, let’s get to the assembly. I like to pre-drill my holes to prevent the wood from splitting—this is a total lifesaver if you’re working with older, reclaimed pieces. Apply a bit of wood glue to the edges for extra stability, then drive your screws in to form the main structure of your planter box. If you’re feeling a bit more adventurous, you can try to create some unique geometric shapes instead of a standard rectangle, which really adds that custom designer touch.
- 4. Before we worry about the aesthetics, we need to address the drainage. A planter without drainage is just a recipe for root rot, and we definitely don’t want that! Use your drill to create several small holes in the bottom of the box. If you’re using a very porous wood, you might even want to line the inside with a thin layer of plastic or a specialized pond liner to help maintain moisture levels without rotting the wood too quickly.
- 5. This is my favorite part because it’s where you can really let your creativity run wild. Grab some sandpaper and smooth out any rough edges until the wood feels soft to the touch. Once that’s done, you can apply a stain or a paint color that matches your home’s vibe. I personally love using a natural oil finish to highlight the grain of the wood, but if you want something bold, a bright pop of color can make these planters look like high-end boutique finds.
- 6. Finally, it’s time for the “deployment” phase—getting your plants in! Start by adding a layer of small pebbles or horticultural charcoal at the bottom to help with drainage, then fill the rest with a high-quality potting mix. Gently transplant your chosen greenery into the soil, making sure to pack it down just enough so the plants feel secure. Once they’re tucked in, give them a good soak and find that perfect sunny spot on your patio or windowsill to show off your new creation.
Mastering Upcycled Container Gardening for a Greener Home
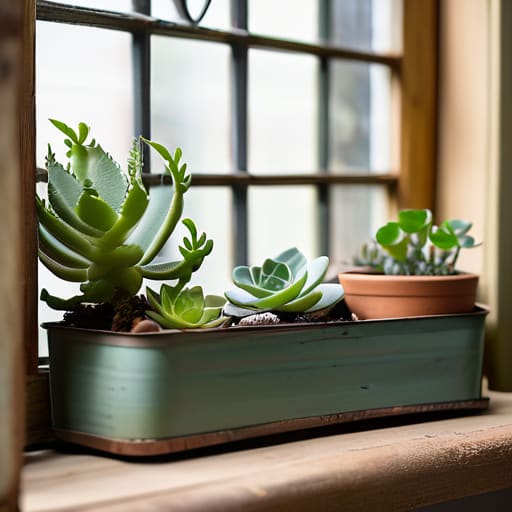
One thing I’ve learned from my woodworking hobby is that you don’t need a massive budget to create something beautiful; sometimes, the best materials are already sitting in your pantry or garage. I’m a huge advocate for upcycled container gardening because it breathes new life into things we usually toss. Think about those old tin cans, wooden crates, or even cracked ceramic mugs. With a little bit of sanding or a fresh coat of paint, these repurposed household items for plants can become stunning focal points in your living room or on your balcony.
The real trick to making these projects last, though, is focusing on the technical side of plant health. Since many of our found objects weren’t originally designed for soil, you have to be smart about drainage solutions for homemade pots. I always keep a small drill handy in my workshop to pop a few holes in the bottom of plastic or metal containers. If you’re working on indoor succulent container crafts, you can even layer small pebbles at the bottom to help prevent root rot. It’s all about balancing aesthetics with function to keep your green friends thriving.
Smart Drainage Solutions for Homemade Pots to Ensure Growth
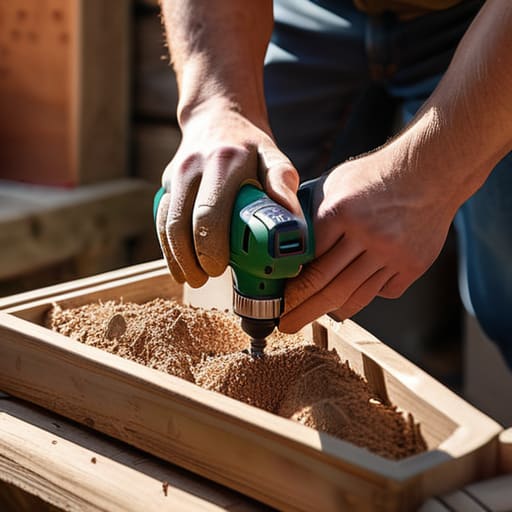
One thing I learned the hard way during my early days of upcycled container gardening is that enthusiasm can actually be a plant killer. It’s so easy to get caught up in the aesthetic of using a beautiful vintage tin or a wooden crate, but if you don’t address the water flow, you’re essentially building a swamp for your roots. When you’re working with repurposed household items for plants, you rarely have those pre-drilled holes you find in store-bought ceramic. To fix this, I always keep a handheld drill or even a heated metal skewer nearby to create essential exit points for excess moisture.
If you’re working on indoor succulent container crafts where you can’t easily drill through a delicate surface, don’t sweat it. You can implement clever drainage solutions for homemade pots by adding a “false bottom.” I usually layer a handful of coarse gravel or even broken bits of old terracotta at the base before adding soil. This creates a buffer zone that prevents the soil from becoming a soggy mess, ensuring your plants stay healthy without needing a specialized workshop.
Pro-Tips for Making Your DIY Planters Last (and Actually Look Good)
- Don’t skip the sealant—if you’re working with wood, grab a good quality outdoor sealant to prevent rot and keep your hard work looking fresh through the seasons.
- Think about your tech integration; if you’re placing these near a patio, consider adding a small, solar-powered moisture sensor to take the guesswork out of watering.
- Scale your container size to the plant’s root system, because nothing kills a DIY project faster than a plant outgrowing its home in just a few weeks.
- Mix up your textures by combining reclaimed wood with sleek metal accents to give your garden setup that intentional, high-end designer feel.
- Always double-check your weight distribution, especially if you’re building tiered planters, to make sure they stay sturdy and don’t tip over when the soil gets heavy with water.
Quick Wins for Your Next DIY Project
Don’t be afraid to repurpose what you already have—upcycling old containers isn’t just budget-friendly, it’s a great way to add some unique, personal character to your space.
Always prioritize drainage; whether you’re using a drill or a hammer, making sure your pots can breathe is the best way to keep your plants (and your hard work) thriving.
Start small and embrace the learning curve; you don’t need a professional workshop to build something beautiful, just a few basic tools and the willingness to get your hands a little dirty.
Why I Love Building My Own Planters
“At the end of the day, there’s something so incredibly satisfying about taking a piece of scrap wood or an old container and turning it into something that actually breathes life into your home—it’s the perfect intersection of tech, tools, and a little bit of soul.”
Sarah Mitchell
Bringing It All Home
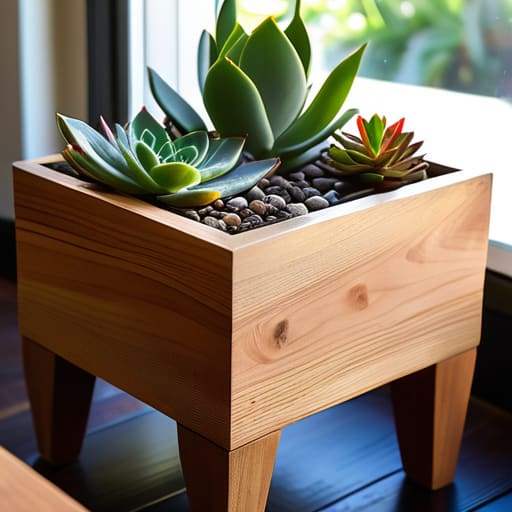
At the end of the day, building your own planters is about more than just finding a place for your succulents to live. We’ve covered everything from the initial design phase to the technical side of things, like ensuring you have smart drainage solutions so your plants actually thrive rather than just surviving. Whether you decided to go the route of upcycling old wooden crates or used a bit of tech to automate your watering, the most important thing is that you’ve built something functional and unique. By focusing on both the structural integrity and the specific needs of your greenery, you’ve essentially created a custom ecosystem right in your own living room.
I know that starting a new project can feel a little intimidating, especially if you feel like you don’t have the “perfect” toolkit yet. But honestly? The best part of DIY isn’t the polished final product you see on Pinterest; it’s the messy, trial-and-error process of learning a new skill. Every time you pick up a drill or experiment with a new material, you’re leveling up your confidence. So, grab that notebook of yours, head to the garage, and just start building. I can’t wait to see how you transform your space and make it truly your own!
Frequently Asked Questions
What kind of sealant should I use to make sure my upcycled wooden planters don't rot after the first few waterings?
Since you’re working with wood, you definitely don’t want to skip this step! I always recommend using a high-quality, non-toxic exterior wood sealer or a water-based polyurethane. If you’re planning on growing edible herbs, look specifically for “food-safe” labels. I usually grab a small tin of linseed oil for a more natural look, but just make sure it’s rated for outdoor use so those waterings don’t turn your hard work into mush!
If I'm using smaller containers, how can I tell if I'm overwatering without constantly poking the soil?
Honestly, I used to do the constant finger-poking thing too, but it’s such a hassle! For smaller containers, I’ve found that weight is your best friend. Pick up the pot when it’s freshly watered, then again a few days later. If it feels surprisingly light, it’s thirsty. Also, keep an eye on the leaves; if they’re looking a bit yellow or mushy, you’re likely overdoing it. Trust your intuition!
Are there specific types of plants that thrive better in DIY pots compared to traditional store-bought ones?
That’s such a great question! Honestly, I think DIY pots give you a huge edge with “thirsty” plants like succulents or herbs. Since you can customize the drainage and soil mix perfectly for each container, you avoid that dreaded root rot common in cheap plastic store-bought pots. I love using my upcycled wooden planters for Mediterranean herbs like rosemary—they crave that specific airflow and customized drainage that only a handmade setup can really provide.
