I was sitting on my floor last Tuesday, surrounded by a literal “nest” of black tangled wires behind my standing desk, feeling completely defeated. I had just finished a long day of debugging code, and instead of feeling accomplished, I just felt overwhelmed by the visual chaos staring back at me. It’s funny how we spend so much time optimizing our software and our career paths, yet we let our physical workspaces descend into a disaster zone. I realized then that a messy desk isn’t just an eyesore; it’s a massive mental drain that kills your focus. That’s when I decided to stop scrolling through expensive, pre-made organizers and finally embrace some cable management diy projects to reclaim my sanity.
In this guide, I’m skipping the flashy, over-priced gadgets you see in targeted ads and getting straight to the practical stuff. I’ll show you how to use simple, inexpensive materials—some of which you probably already have in your junk drawer or woodworking shop—to create a clean, streamlined setup. We’re going to walk through realistic ways to bundle, hide, and label your cords so you can stop fighting your hardware and start enjoying your space again.
Table of Contents
- Step-by-Step Instructions
- Smart Under Desk Cable Management Solutions for Peak Productivity
- Creative Diy Cable Organizer Ideas to Declutter Your Workstation Wires
- My Top 5 Pro-Tips for Keeping the Chaos at Bay
- Wrapping It All Up: My Top Tips for a Stress-Free Setup
- ## The Mental Clarity of a Clean Setup
- Bringing It All Home
- Frequently Asked Questions
Guide Overview
Tools & Supplies
- Scissors or wire cutters for trimming ties
- Label maker or masking tape for identification
- Velcro cable ties (1 pack)
- Cable management sleeves or raceways (1-2 units)
- Adhesive cable clips (1 pack)
- Power strip/surge protector (1 unit)
Step-by-Step Instructions
- 1. First things first, you’ve got to unplug everything. I know, it sounds like a pain, but trying to organize a “live” nest of wires is a recipe for frustration and accidental unplugging. Clear your desk completely so you have a blank canvas to work with. It’s a lot like sanding down an old piece of wood before you start staining—you need a clean surface to do the job right.
- 2. Once the desk is clear, grab a handful of labels or even just some masking tape and a sharpie. Trace each cord from one end to the other so you know exactly which plug belongs to your monitor, your laptop, or that weird little desk lamp. Trust me, you’ll thank yourself later when you’re troubleshooting a connection and don’t have to play “guess the wire” in the dark.
- 3. Now, let’s talk about grouping. I love using Velcro ties rather than those annoying plastic zip ties. Zip ties are fine if you’re a pro, but they can be a bit too permanent and can actually pinch or damage your cables if you pull them too tight. Velcro is reusable, much more forgiving, and makes it super easy to add new gear down the road without having to cut anything.
- 4. Next, let’s get those power strips off the floor. A tangled mess of power bricks on the ground is just a magnet for dust bunnies and tripping hazards. I usually mount my power strip to the underside of my desk using heavy-duty command strips or a simple mounting bracket. Getting that “brain” of your setup up high keeps everything looking clean and intentional.
- 5. This is where the DIY magic really happens: use some cable trays or even a repurposed wooden trough to hide the excess slack. If you’re feeling crafty, you can even upcycle a small wooden box to act as a “cable garage” for your chargers. The goal is to hide the bulk of the cords while still leaving enough room for airflow so your tech doesn’t overheat.
- 6. For the wires that absolutely have to run down the legs of your desk, use some adhesive cable clips. Don’t just let them dangle; guide them along the back edge of the desk or down the leg in a straight line. It makes a massive visual difference when you look at your setup from a distance, turning a chaotic mess into a streamlined, professional workstation.
- 7. Finally, do a quick “tug test” and a power-on check. Make sure nothing is being pulled too tight and that your connections are actually secure. Take a moment to sit back and really admire your work. There is something incredibly satisfying about looking at a tidy, organized space—it honestly makes me feel so much more focused and ready to tackle my next coding project.
Smart Under Desk Cable Management Solutions for Peak Productivity
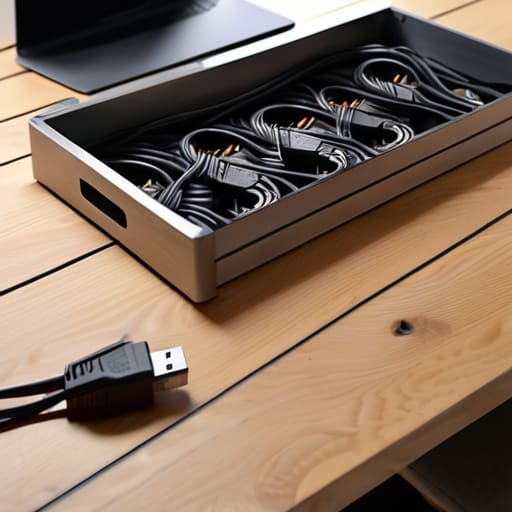
Once you’ve tackled the visible mess on top of your desk, it’s time to look underneath. This is where the real magic happens, but it’s also where the “spaghetti monster” usually lives. I’ve found that investing a little time into under desk cable management solutions makes a massive difference in how much headspace you actually have. Instead of letting everything dangle, I love mounting a wire tray or even a simple mesh hammock to the underside of my desk. It keeps the heavy power bricks off the floor and makes cleaning so much easier.
If you’re looking for some budget-friendly diy cable organizer ideas, don’t overlook the power of simple fasteners. I always keep a roll of hook-and-loop fasteners in my workshop; using velcro straps for cables is a total game-changer compared to those annoying plastic zip ties. Velcro allows you to add or remove cords easily when you’re swapping out a new monitor or a peripheral, which is something I do all the time. It’s all about creating a system that’s flexible enough to grow with your tech setup.
Creative Diy Cable Organizer Ideas to Declutter Your Workstation Wires

If you’re looking to get a bit more hands-on, I love leaning into my woodworking roots to create something truly custom. Instead of buying a generic plastic tray, you can repurpose some scrap wood to build a custom trough that mounts right to the back of your desk. This is one of my favorite diy cable organizer ideas because it allows you to hide the bulky power bricks that usually clutter the floor. By creating a dedicated “dock” for your hardware, you aren’t just hiding the mess; you’re building a structural part of your workspace that feels intentional and high-end.
For those who prefer a quicker fix, don’t underestimate the power of small, clever hacks. I always keep a roll of hook-and-loop fasteners in my toolkit because using velcro straps for cables is a total game-changer compared to those annoying plastic zip ties that are impossible to undo. You can even use binder clips attached to the edge of your desk to keep your charging cords from sliding onto the floor every time you unplug your laptop. It’s all about those little wins that make decluttering workstation wires feel less like a chore and more like a creative project.
My Top 5 Pro-Tips for Keeping the Chaos at Bay
- Label everything before you hide it. Trust me, when you’re troubleshooting a connection six months from now, you’ll be so glad you didn’t have to play “guess the wire” with a giant black spaghetti mess. A little piece of masking tape or a label maker goes a long way.
- Invest in some heavy-duty Velcro strips instead of plastic zip ties. Zip ties are great for permanent setups, but if you’re like me and constantly swapping out peripherals or adding new gear, Velcro lets you adjust things without needing a pair of scissors and a prayer.
- Don’t forget about the power strip itself. Instead of letting that bulky brick dangle or sit awkwardly on the floor, use some command strips or a mounting bracket to secure it directly to the underside of your desk. It keeps the “brain” of your setup completely out of sight.
- Use cable sleeves for those “danger zones.” If you have a cluster of wires running from your desk down to the wall outlet, grouping them into a single braided sleeve makes it look like one clean line rather than a tangled mess of individual cords.
- Leave a little bit of “slack” in your lines. It sounds counterintuitive to leave extra wire, but if you pull everything bone-tight, you risk damaging the ports or the cables themselves whenever you move your monitor or chair. Give your tech a little breathing room!
Wrapping It All Up: My Top Tips for a Stress-Free Setup
Don’t try to do everything in one afternoon; start with the biggest “tangle” first and build your organization system piece by piece.
Invest in a few quality basics—like Velcro ties or a sturdy cable tray—because the right tools make the DIY process much more rewarding and much less frustrating.
Remember that a clean workspace isn’t just about aesthetics; it’s about clearing the mental clutter so you can actually focus on the work that matters.
## The Mental Clarity of a Clean Setup
“Honestly, a tangled mess of wires isn’t just an eyesore; it’s a constant, subtle drain on your focus. When you take the time to DIY a clean cable setup, you’re not just organizing your desk—you’re clearing the mental clutter so you can actually get into your flow and start creating.”
Sarah Mitchell
Bringing It All Home
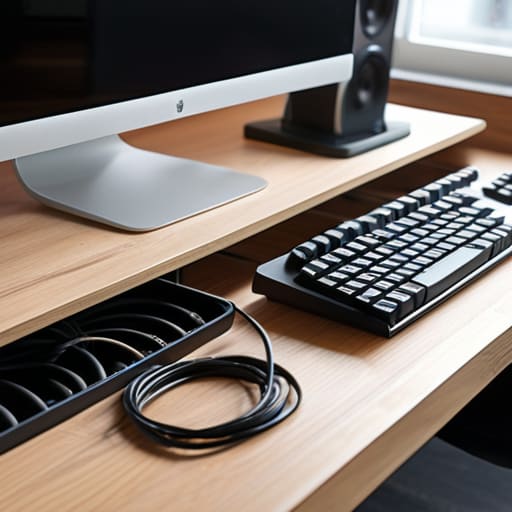
At the end of the day, tackling your cable management isn’t just about making your desk look like something out of a tech magazine; it’s about reclaiming your mental space. We’ve walked through everything from securing those heavy power strips under your desk to getting creative with some simple DIY organizers that actually work. Whether you opted for a sleek, hidden setup or a more visible, handcrafted solution, the goal was to eliminate the visual noise that distracts you while you’re coding or working. By taking these small, intentional steps to organize your wires, you’ve essentially built a stronger foundation for your daily workflow and a much cleaner environment for your tech to thrive in.
I know that starting a DIY project can sometimes feel a bit daunting, especially when you’re staring at a literal bird’s nest of tangled cords, but I promise the effort is worth it. There is something incredibly satisfying about looking at a clean, organized workspace and knowing you built that order yourself. Don’t feel like you have to get it perfect on the first try—just grab your notebook, pick one small area to start with, and keep building. Remember, every little tweak you make to your environment is an investment in your own productivity and peace of mind. You’ve got this!
Frequently Asked Questions
Are there any specific DIY materials I should avoid so I don't accidentally create a fire hazard with my electronics?
That is such a smart question to ask. Honestly, safety should always come before aesthetics. Please, steer clear of using highly flammable materials like loose fabric, untreated wood, or even certain types of cheap plastic twine to bundle your cables. If a cord gets warm during use, you don’t want something nearby that can catch fire easily. Stick to fire-rated Velcro ties or metal cable trays—they’re much safer and keep your workspace worry-free!
How do I manage cables if I have a standing desk that needs to move up and down throughout the day?
Standing desks add a layer of complexity because you can’t just tie everything down tightly—if you do, you’ll end up snapping a connection when the desk rises. My golden rule? Leave “service loops.” Always ensure there’s enough slack in your cables to reach the highest point of your desk. I personally love using a cable spine or a flexible conduit; it keeps the wires bundled neatly while allowing them to move gracefully up and down.
What's the best way to organize my wires without using permanent adhesives that might ruin my desk's finish?
I totally get that—I’ve definitely learned the hard way that some adhesives are a nightmare to peel off a nice wood finish! If you want to keep your desk pristine, I’m a huge fan of using weighted cable holders or even just some simple Velcro ties. You can also try using under-desk cable trays that clamp onto the edge of the desk. It keeps everything tidy without leaving a single sticky residue behind.
