I was standing in my living room last weekend, staring at a stack of beautiful, expensive frames and a wall that looked more like a blank canvas of despair than a home. I had this nagging feeling that if I tried to figure out how to hang a picture without a plan, I’d end up with a dozen tiny, irreparable holes and a crooked masterpiece that made my stomach turn. We’ve all been there—that moment of hesitation where you wonder if you should just leave it for another day or risk the drywall.
But here’s the thing: you don’t need to be a professional carpenter or a master of interior design to get this right. I’ve spent plenty of hours in my workshop and my apartment learning through trial and error, and I’ve distilled all that messy experience into something actually useful. In this guide, I’m going to walk you through the no-nonsense steps to leveling, measuring, and securing your art so it stays exactly where you want it. No fluff, no complicated jargon—just the straightforward techniques you need to finally turn that house into a home.
Table of Contents
- Step-by-Step Instructions
- Smart Measuring for Picture Placement and Perfect Alignment
- Choosing Between Command Strips vs Nails for Your Space
- Pro Secrets for a Gallery-Ready Look
- Quick Wins for a Flawless Gallery Wall
- The Real Secret to a Perfect Gallery Wall
- Putting the Finishing Touches on Your Gallery
- Frequently Asked Questions
Guide Overview
Tools & Supplies
- Hammer for driving nails
- Pencil for marking positions
- Tape measure for spacing
- Picture hanging hardware (nails or hooks) 1 pack
- Level to ensure straightness 1 unit
Step-by-Step Instructions
- 1. Before you even touch a hammer, grab that little notebook of mine and map out your vision. I always like to lay my frames out on the floor in front of the wall first. This helps you get a feel for the scale and ensures the art isn’t sitting too high—a common mistake that can make a room feel totally off. Once you’re happy with the layout, use a pencil to lightly mark where you want the center of the piece to be.
- 2. Next, you need to decide on your hardware based on what you’re actually hanging. If it’s a lightweight print, a simple finishing nail might do the trick, but for those heavier, solid wood frames I love to upcycle, you’ll definitely want to use a wall anchor. Trust me, nothing kills the vibe faster than a heavy frame sliding down the wall in the middle of the night because the hardware couldn’t handle the weight.
- 3. Now, let’s get precise with the measurement. Take a measuring tape and find the distance from the top of the frame to the hanging wire or the sawtooth hanger on the back. Subtract that distance from your pencil mark on the wall. This ensures that when you drive the nail in, the top of the frame actually lands exactly where you planned.
- 4. Time to get a little bit “techy” with your precision—grab a level. Even if you think you have a steady hand, don’t skip this step. Place the level on top of the frame (or use a small torpedo level against the side) to make sure everything is perfectly straight. If you’re hanging a gallery wall, this is the moment where patience pays off more than anything else.
- 5. Carefully hammer your nail or screw into your marked spot. If you’re working with drywall, I highly recommend driving your anchor in first to give that nail something solid to bite into. Give the nail a tiny tap to make sure it’s secure, but don’t drive it in so deep that the head is flush with the wall, or you won’t have anything to catch the wire.
- 6. Gently slide your frame onto the hook or nail. Once it’s up, take one more look at it through your eyes, not just your tools. Step back a few feet to check the overall balance of the room. If it looks a little crooked or too low, don’t be afraid to nudge it—it’s much easier to adjust now than it is to patch holes later!
Smart Measuring for Picture Placement and Perfect Alignment
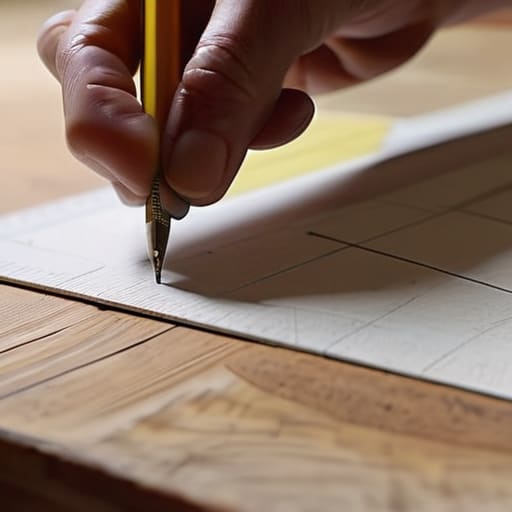
Before you even touch a hammer, you need to get your measurements dialed in. I’ve definitely learned the hard way that “eyeing it” usually leads to a crooked mess. When you’re measuring for picture placement, don’t just focus on the center point of the frame. Instead, measure from the top of the frame down to the hanging hardware on the back. This ensures that when you finally drive that nail in, the art actually sits where you envisioned it, rather than ending up way too high or awkwardly low.
Once you have your spot, don’t forget about the weight. If you’re hanging heavy frames, you’ll want to skip the lightweight adhesive options and look into more robust wall mounting hardware types, like anchors or heavy-duty screws. If you’re working with a renter’s space and want to focus on avoiding wall damage, a quick comparison of command strips vs nails is essential; just make sure those strips are rated for your specific frame’s weight! Taking these extra few minutes now will save you from the headache of having to re-do the whole project later.
Choosing Between Command Strips vs Nails for Your Space
Now, this is where I see a lot of people get stuck: deciding whether to grab the hammer or the adhesive. Honestly, there isn’t a single “right” answer, but your choice really depends on your living situation and what you’re actually trying to display. If you’re renting an apartment or living in a place where you want to keep your security deposit intact, command strips vs nails is the classic debate. I personally love using strips for lightweight prints or small canvases because they are incredible for avoiding wall damage. Just make sure you follow the weight instructions to a T; there is nothing more heartbreaking than seeing your favorite art slide down the wall because the adhesive gave up.
On the flip side, if you’re working with substantial pieces or hanging heavy frames, you’re going to want to go the traditional route. Nails or even picture hooks provide that much-needed mechanical security that adhesives sometimes lack. When I’m working on a larger gallery wall, I lean toward nails because they feel more permanent and reliable. Just keep a small level handy—leveling wall art can be a bit finicky once you start driving hardware into the drywall, so take your time!
Pro Secrets for a Gallery-Ready Look
- Trust your eyes, not just the level. Sometimes a piece looks perfectly straight according to a tool but feels “off” to the human eye because of the surrounding furniture; if it looks right to you, go with your gut!
- Keep your eye level in mind. A common mistake I see is hanging art too high—aim for the center of the piece to be about 57 to 60 inches from the floor, which is the standard museum height.
- Work in groups for a cohesive vibe. If you’re working with a collection of smaller frames, try grouping them together to create one large visual statement rather than scattering them randomly around the room.
- Don’t forget the “weight” of the art. If you have a massive, heavy mirror or a thick wooden frame, make sure you’re using heavy-duty anchors rather than just a standard nail to avoid any unexpected midnight crashes.
- Use painter’s tape to test your layout. Before you even pick up a hammer, use some blue painter’s tape to outline where the frames will go on the wall; it’s a total lifesaver for visualizing the scale without making a single hole.
Quick Wins for a Flawless Gallery Wall
Don’t rush the prep work—taking an extra minute to measure twice and eye-ball the height ensures you won’t end up with a crooked or awkwardly placed masterpiece.
Match your hardware to your walls; use Command strips if you’re in a rental or working with delicate surfaces, but don’t be afraid to grab a hammer and nails for something heavier and more permanent.
Think beyond the center point—using smart alignment techniques helps you create a cohesive look that makes your entire room feel intentional and professionally styled.
The Real Secret to a Perfect Gallery Wall
“At the end of the day, don’t sweat the tiny imperfections. Whether you’re using a nail or a Command strip, the goal isn’t just a level frame—it’s about creating a space that actually feels like home.”
Sarah Mitchell
Putting the Finishing Touches on Your Gallery
At the end of the day, hanging a picture is about more than just getting a nail into a wall; it’s about the details. We’ve walked through the essentials, from getting those precise measurements to ensure your art sits at eye level, to deciding whether you need the heavy-duty strength of a nail or the damage-free convenience of Command strips. Remember, the secret to a professional-looking room isn’t luck—it’s simply having the right tools and a little bit of patience while you align everything. If a frame looks slightly crooked at first, don’t sweat it; just take a step back, adjust, and try again.
I know that staring at a blank, white wall can feel a bit overwhelming, especially if you’re worried about making a mistake. But honestly? This is where the fun begins. Whether you’re displaying a sentimental photo from your travels or a piece of art that makes you smile every time you walk by, you are curating your own space. Every small DIY project, no matter how minor it seems, is a way to claim your environment and make it truly yours. So, grab your level, trust your instincts, and go turn that empty wall into something beautiful!
Frequently Asked Questions
What should I do if I accidentally hit a stud or, even worse, a wire while drilling?
Oh man, take a deep breath—it happens to the best of us! If you hit a stud, you’ve actually struck gold; just stop drilling and use a longer screw to secure your hardware directly into that solid wood. But if you suspect you’ve hit a wire, stop immediately and turn off your power at the breaker. It’s better to deal with a small hole now than a major electrical headache later!
How do I create a professional-looking gallery wall without everything looking crooked or cluttered?
The secret to a gallery wall that looks intentional rather than chaotic is all about the layout. Before you even touch a hammer, lay your frames out on the floor. I always find it helpful to trace the frames onto kraft paper, cut them out, and tape them to the wall—it’s a total game-changer for visualizing the spacing. Keep your gaps consistent (about 2-3 inches) and try grouping pieces around a central “anchor” to keep things cohesive!
Is it possible to hang heavy, oversized frames using only adhesive strips, or am I definitely going to need a drill?
I’ll give it to you straight: if you’re dealing with something heavy or oversized, I’d steer clear of adhesive strips. I love the convenience of Command strips for light decor, but for those massive, statement pieces, they just don’t offer the security you need. I’ve seen too many beautiful frames end up on the floor! Honestly, grab a drill and some proper anchors. It’s a bit more work, but your peace of mind is worth it.
