I remember sitting on my workshop floor last winter, surrounded by half-finished woodworking projects and a mountain of expensive, store-bought body washes that left my skin feeling like sandpaper. I kept thinking, why is it so hard to just find something simple and clean? That frustration is exactly what led me down the rabbit hole of learning how to make soap from scratch. I quickly realized that most people make it way more complicated than it needs to be, acting like you need a chemistry degree or a high-tech lab to get started. Truthfully, it’s much more about the joy of the process and having a solid, reliable method than it is about fancy equipment.
In this guide, I’m stripping away all the intimidating jargon and the “perfect” Instagram aesthetics to give you a real-world roadmap. I’ll walk you through the essential supplies, the safety basics, and the actual steps to create a bar you’ll be proud to use. My goal is to provide you with practical, no-nonsense advice so you can stop overthinking and start creating. Whether you want to save money or craft the perfect gift, you’re going to learn exactly how to master this craft one batch at a time.
Table of Contents
- Step-by-Step Instructions
- Mastering Cold Process Soap Making Methods for Beginners
- Essential Oils for Natural Soap and Skin Loving Ingredients
- Pro-Tips from My Workbench: Avoiding Common Soap-Making Pitfalls
- My Top Tips for Soap Making Success
- The Real Magic of Making Your Own Soap
- Final Thoughts Before Your First Batch
- Frequently Asked Questions
Guide Overview
Tools & Supplies
- Digital scale for precise measurements
- Stick blender for emulsifying oils and lye
- Heat-resistant glass beaker or pot for lye solution
- Silicone molds for shaping the soap
- Coconut oil (approx. 500g)
- Olive oil (approx. 500g)
- Sodium hydroxide/Lye (approx. 140g)
- Distilled water (approx. 330g)
- Essential oils (approx. 30ml)
Step-by-Step Instructions
- 1. First things first, let’s talk safety. Since we’re working with lye (sodium hydroxide), you need to treat it with the same respect you’d give a high-voltage circuit. Grab your safety goggles, some long sleeves, and rubber gloves. I always make sure my workspace is completely clear of clutter before I start, because one accidental spill can turn a fun project into a real headache.
- 2. Once you’re geared up, it’s time to prep your liquids and lye. Measure out your distilled water and your lye separately using a digital scale—and remember, always add the lye to the water, never the other way around. If you do it in reverse, it can cause a sudden, scary chemical reaction. Give it a gentle stir until the lye is fully dissolved, then set it aside in a safe spot to cool down.
- 3. While your lye solution is chilling, go ahead and melt your fats and oils. Whether you’re using coconut oil, olive oil, or shea butter, I find it’s easiest to use a double boiler method to keep things even. You’re aiming for a nice, consistent liquid state, so just keep an eye on the temperature and try to avoid overheating your precious oils.
- 4. Now comes the “techy” part of the process: emulsification. Once both your lye water and your oils have cooled down to roughly the same temperature (usually between 90°F and 110°F), slowly pour the lye solution into your oils. Grab your stick blender and start pulsing it. You’re looking for “trace,” which is that moment when the mixture thickens to the consistency of pudding or thin custard.
- 5. This is where you get to be creative and add your “features.” If you want to add essential oils for scent or some dried botanicals for aesthetics, now is the time to stir them in by hand. I love using my small notebook to jot down the exact ratios I used, because honestly, half the fun is trying to replicate a perfect batch later on!
- 6. Finally, pour your mixture into your mold. If you’re using a silicone mold, you’re in luck—it’ll be super easy to pop them out later. Tap the mold firmly on the counter a few times to help get rid of any trapped air bubbles. Cover the mold with a piece of cardboard and a towel to keep the heat in, and then you just have to be patient.
- 7. The hardest part for me is always the waiting. You’ll need to let your soap sit and cure for anywhere from 4 to 6 weeks. This isn’t just about letting it get hard; it’s about the chemical process finishing so the bar is gentle on your skin. Once it’s cured, slice it into bars, and you’ll have something much more rewarding than anything you could grab off a grocery store shelf.
Mastering Cold Process Soap Making Methods for Beginners
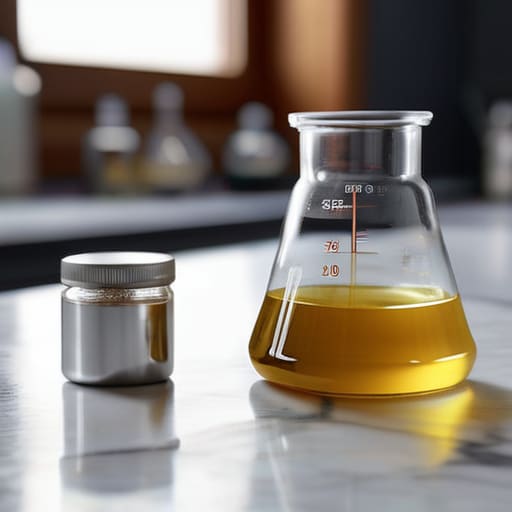
Now that you’ve got the basic steps down, I want to talk about the nuance that separates a “meh” bar from a professional-grade one. When you’re diving into cold process soap making methods, precision is your best friend. One of the biggest hurdles for beginners is getting the chemistry right, so please, do not try to eyeball your measurements. I always recommend using a reliable lye and oils ratio calculator before you even touch a beaker. It takes the guesswork out of the equation and ensures your soap is safe and skin-friendly rather than too harsh.
While you’re experimenting, remember that your choice of additives can completely change the experience. If you’re looking to keep things clean and simple, focusing on natural soap ingredients for skin—like shea butter or olive oil—will give you that luxurious, creamy lather we all crave. I also love playing with scent, but be mindful: using high-quality essential oils for natural soap provides a much more sophisticated aroma than synthetic fragrances. Just keep testing small batches until you find your “signature” recipe!
Essential Oils for Natural Soap and Skin Loving Ingredients
Now that you’ve got the basics of the chemistry down, let’s talk about the fun part: the scent and the skin benefits. When I’m working on a new batch, I love experimenting with essential oils for natural soap because they offer a complexity that synthetic fragrances just can’t match. Lavender is a classic for a reason—it’s incredibly soothing—but if you want something a bit more energizing, a blend of sweet orange and peppermint can really wake up your senses during a morning shower. Just remember to always do a quick skin patch test first, as even natural oils can be potent.
Beyond the scent, I’m a huge advocate for adding extra nourishment to your bars. Since we’re focusing on high-quality natural soap ingredients for skin, I always recommend incorporating things like shea butter, colloidal oatmeal, or even a touch of honey. These additions turn a simple cleansing bar into a luxury experience. If you’re feeling a bit nervous about the additives, don’t sweat it; start with just one or two extra ingredients to see how they affect your trace and scent throw. It’s all about learning through experimentation!
Pro-Tips from My Workbench: Avoiding Common Soap-Making Pitfalls
- Safety first, always! I know it sounds a bit intense, but working with lye is no joke. I always make sure I’m wearing my goggles and gloves, and I keep a bottle of vinegar nearby just in case. Think of it like debugging code—you want to catch those errors before they crash your entire system.
- Precision is your best friend. When I’m working on a woodworking project, being off by a millimeter matters, and soap is exactly the same. Use a digital scale to weigh everything in grams rather than relying on volume measurements like cups. It’s the only way to ensure your recipe actually works every single time.
- Don’t rush the curing process. It’s tempting to want to use your beautiful new creation immediately, but patience is key. Letting your soap cure for 4 to 6 weeks allows the water to evaporate, resulting in a much harder, longer-lasting bar that won’t turn into mush the second it hits your shower.
- Keep an eye on your temperatures. If your lye solution and your oils are too far apart in temperature when you mix them, you might run into “false trace” or even “soap separation.” I like to aim for a sweet spot around 100°F (38°C) for both, but always trust your thermometer over a guess.
- Embrace the mess and learn from it. Seriously, even with my background in engineering, I’ve had batches that didn’t turn out quite right. If a batch fails, don’t toss it! It’s just a learning opportunity. Document what went wrong in your notebook, tweak the variables, and try again. That’s how you truly master the craft.
My Top Tips for Soap Making Success
Don’t skip the safety gear—working with lye can be intimidating at first, but wearing your gloves and goggles is non-negotiable for a stress-free session.
Embrace the mess and the learning curve; your first few batches might not look like something from a boutique shop, but that’s just part of the process of mastering your craft.
Start with simple, high-quality oils and scents before getting too experimental, so you can build a solid foundation of how different ingredients behave together.
The Real Magic of Making Your Own Soap
“There’s something incredibly grounding about stepping away from the screen and getting your hands messy with lye and oils; it’s not just about making a bar of soap, it’s about the quiet confidence that comes from knowing exactly what you’re putting on your skin and the satisfaction of building something useful from scratch.”
Sarah Mitchell
Final Thoughts Before Your First Batch
Taking your first step into soap making can feel a bit like debugging a complex piece of code—there are a lot of moving parts, and you have to be precise. We’ve covered everything from choosing the right cold process method to selecting those skin-loving ingredients and essential oils that make your creations truly special. Remember, the most important part of this process is respecting the science behind the lye and oils while still allowing yourself room to experiment. Once you’ve mastered the fundamental safety steps and the basic chemistry, you’ll realize that soap making isn’t just a chore; it’s a repeatable, rewarding system that yields incredible results.
If you’re feeling a little nervous about making a mistake, just think of it like my woodworking projects: even if a cut isn’t perfect, there is almost always a way to sand it down or upcycle it into something even better. Don’t let the fear of a “failed” batch stop you from starting. The real magic happens when you stop reading tutorials and actually get your hands messy. I truly believe that once you hold that first bar of soap you made from scratch, you’ll feel a massive boost in confidence. So, grab your notebook, prep your workspace, and start creating something beautiful today!
Frequently Asked Questions
Is it safe to make soap in my kitchen, or do I need a dedicated workspace to avoid contaminating my food?
This is such a common concern, and honestly, I totally get it. Since you’re working with lye, I wouldn’t recommend using the same cutting board you use for dinner! You don’t need a dedicated studio, but I do suggest clearing off one specific area of your counter and using a silicone mat. Just keep your soap supplies strictly separated from your food prep, and you’ll be perfectly fine to craft right in your kitchen.
How long do I really need to wait before I can actually use my first batch of soap?
I know, the anticipation is killing you! I’ve definitely been there, staring at my curing soap like it’s going to magically transform overnight. But here’s the real talk: for cold process soap, you really need to wait about four to six weeks. This “curing” period allows the water to evaporate, making your bars harder and much longer-lasting. It’s a test of patience, but I promise, that first lather is worth the wait!
What should I do if my soap batter looks weird or doesn't seem to be thickening correctly during the process?
Don’t panic—we’ve all been there! If your batter looks grainy or won’t hit that “trace” stage, it’s usually just a temperature issue. If it’s too cold, the oils might be seizing; if it’s too hot, it can get messy. Grab your notebook and jot down the temps you’re using next time. If it’s truly stuck, you can often save it by gently reheating it in a double boiler to get things moving again.
