I was standing in my tiny kitchen last Tuesday, staring down at a sink full of murky, lukewarm water that refused to budge, feeling that familiar surge of “why does this always happen to me?” It’s one of those moments where you realize that despite all my software engineering logic, some things in life just don’t follow a clean line of code. Most people think you need to call an expensive plumber the second things slow down, but I’m here to tell you that learning how to unclog a drain is actually a much more manageable skill than it seems. You don’t need a degree in civil engineering; you just need the right approach and a little bit of patience.
In this guide, I’m stripping away the complicated jargon and the overpriced chemical cleaners that can actually damage your pipes. Instead, I’m sharing my personal, no-nonsense toolkit of DIY methods that have saved me more times than I can count. We’re going to walk through everything from simple mechanical fixes to some clever household hacks that actually work. My goal is to give you the confidence to tackle this mess yourself so you can get back to your day without breaking the bank.
Table of Contents
- Step-by-Step Instructions
- Simple Natural Drain Cleaner Recipes for a Greener Home
- Perfecting Plunger Techniques for Sinks and Shower Drains
- Pro-Tips to Keep the Clogs at Bay
- Quick Wins for a Clearer Drain
- Embracing the Messy Parts of Homeownership
- You've Got This: Tackling the Last of the Clogs
- Frequently Asked Questions
Guide Overview
Tools & Supplies
- Plunger (cup-style for sinks or flange-style for toilets)
- Drain snake or auger (to clear deeper obstructions)
- Rubber gloves (for hygiene and protection)
- Baking soda (1/2 cup)
- White vinegar (1/2 cup)
- Boiling water (1 kettleful)
Step-by-Step Instructions
- 1. First things first, let’s try the simplest method before we go breaking out the heavy machinery: the boiling water trick. Boil a kettle of water and slowly pour it down the drain in two or three stages. This works wonders for clearing out soap scum or grease buildup that’s just starting to settle in the pipes. Just a quick heads-up though—if you happen to have PVC pipes, don’t use boiling water as it can actually damage the seals; stick to very hot tap water instead.
- 2. If the hot water doesn’t do the trick, it’s time to grab your trusty plunger. You’ll want to make sure you have a good seal around the drain to create the necessary pressure. If you’re dealing with a double sink, go ahead and plug the other drain with a wet rag to prevent the air from just escaping out the other side. Give it a few firm, rhythmic plunges to try and dislodge whatever is causing the backup.
- 3. Now, if you’re feeling a bit more adventurous (and don’t mind getting your hands a little dirty), let’s try the baking soda and vinegar combo. It’s a classic DIY move for a reason! Pour about half a cup of baking soda down the drain, followed by half a cup of white vinegar. It’s going to fizz and bubble like a science experiment, which is exactly what you want. Let that reaction sit for about fifteen minutes before flushing it all down with hot water.
- 4. If we’re still staring at standing water, we might need to get a bit more tactical with a drain snake or an auger. This is where my woodworking background comes in handy—you need the right tool for the job. Feed the cable into the drain until you feel resistance, then give it a little twist to grab onto the clog. It might feel a bit gross, but don’t let it intimidate you; once you pull that obstruction out, you’ll feel like a total pro.
- 5. For those stubborn bathroom clogs, the culprit is almost always a tangle of hair caught near the stopper. If you can see the blockage, I highly recommend using a small plastic “zip tool” or even a bent wire hanger to hook it out. It’s definitely not the most glamorous part of home maintenance, but it is incredibly satisfying to see that mess finally disappear.
- 6. As a final resort, you might need to get under the sink and inspect the P-trap. That U-shaped pipe is designed to hold water and block sewer gases, but it’s also the perfect place for debris to settle. Place a bucket underneath to catch any water, unscrew the slip nuts by hand (or with a wrench if they’re stuck), and give the trap a thorough cleaning. Just make sure you tighten everything back up securely so you don’t end up with a leak!
Simple Natural Drain Cleaner Recipes for a Greener Home
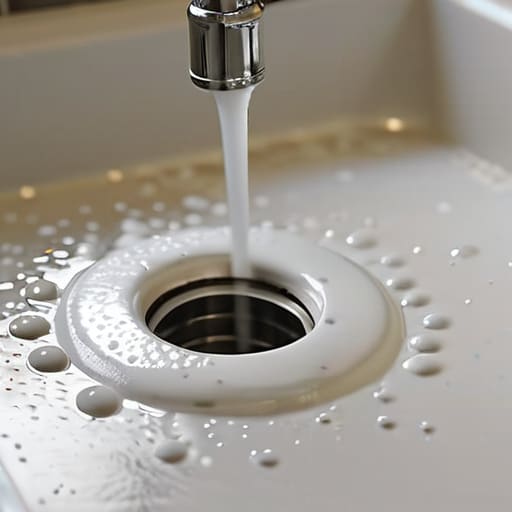
If you’ve already tried the heavy-duty stuff and realized you’d rather not have harsh chemicals swirling around your pipes (or your skin), I totally get it. I’ve always been a big fan of keeping things eco-friendly, especially when it comes to the stuff that goes down our drains. One of my absolute favorite go-to’s is the classic baking soda and vinegar method. It’s a bit of a science experiment in your own kitchen, but it works wonders for breaking down minor buildup without the toxic fumes. Just pour in some baking soda, follow it up with a generous splash of vinegar, let it fizz away for a bit, and then flush it with boiling water.
Beyond just fixing a problem, I’m a huge advocate for preventing future drain clogs before they even start. Think of it like debugging code—it’s much easier to write clean scripts than it is to fix a massive system crash later! I like to run a quick flush of hot water and a little bit of natural cleaner once a week to keep everything moving smoothly. It’s a small habit that saves so much headache down the road.
Perfecting Plunger Techniques for Sinks and Shower Drains
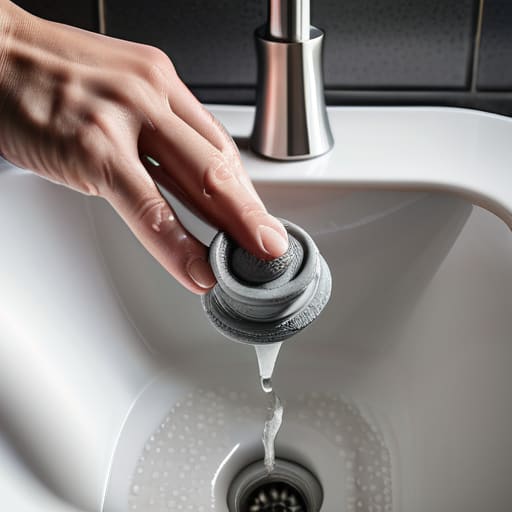
If you’ve already tried a few natural remedies and things are still feeling sluggish, it might be time to get a little more hands-on with a plunger. I’ve learned the hard way that not all plungers are created equal, and using the wrong one can feel like a total waste of energy. For sinks, you really want to use a flat-bottomed cup plunger rather than the flange style meant for toilets. The trick to mastering plunger techniques for sinks is all about creating a tight seal. If you’re working on a bathroom sink, try plugging the overflow hole with a damp rag first—this ensures you’re actually building up pressure rather than just pushing air around.
When it comes to the shower, the struggle is usually a bit different. You’re often dealing with a localized mess, which makes removing hair from shower drains a bit of a tactical operation. I usually start by clearing any visible debris near the surface before applying pressure. If the plunger isn’t doing the trick, don’t be afraid to step up to using a plumbing snake to reach those deeper, stubborn tangles. It’s a bit more work, but it’s incredibly satisfying to see that clear path return!
Pro-Tips to Keep the Clogs at Bay
- Get into the habit of using a mesh drain strainer in your sinks and showers; it’s a tiny investment that stops hair and food scraps from causing a massive headache later.
- If you notice the water starting to drain a little slower than usual, don’t wait for a total backup—hit it immediately with a bit of boiling water to melt away any lingering soap scum or grease.
- Avoid the temptation to pour liquid chemical cleaners down the drain; they can actually eat away at your pipes over time, and I’d much rather see you use a physical tool or a natural solution.
- Keep a zip-tie drain tool (those long, skinny plastic strips with barbs) in your utility drawer; they are absolute lifesavers for grabbing up hair clogs without having to take the whole plumbing assembly apart.
- When you’re working with a plunger, make sure there’s enough water in the sink to cover the bell of the tool—you need that seal to create the pressure necessary to actually move the obstruction.
Quick Wins for a Clearer Drain
Don’t jump straight to the harsh chemicals; often, a little bit of patience and some natural ingredients like baking soda and vinegar can do the trick without damaging your pipes.
Master your tools before you need them—knowing exactly how to use a plunger or a drain snake makes a stressful situation feel way more manageable.
Prevention is your best friend, so make it a habit to clear out hair and debris regularly to avoid those midnight plumbing emergencies in the first place.
Embracing the Messy Parts of Homeownership
“A clogged drain might feel like a frustrating setback, but I’ve learned that most problems—whether they’re in your plumbing or your career—are just opportunities to roll up your sleeves, learn a new skill, and regain control of your space.”
Sarah Mitchell
You've Got This: Tackling the Last of the Clogs
At the end of the day, dealing with a slow drain doesn’t have to be a massive, overwhelming ordeal. We’ve walked through everything from the mechanical muscle of a good plunger to those gentle, eco-friendly solutions like baking soda and vinegar that keep your home safe and green. Whether you decided to dive in with a snake or preferred a more hands-off approach with a natural cleaner, the most important thing is that you took the initiative to fix the problem yourself. Remember, the goal isn’t just to clear the pipes, but to build your confidence in handling those little household hiccups that tend to pop up when we least expect them.
I know that staring at a sink full of standing water can feel a bit discouraging, but I promise you that these small victories matter. Just like learning a new coding language or finally mastering a tricky woodworking joint, home maintenance is a skill that grows with practice. Don’t let a little bit of plumbing stress get you down; instead, see it as another chance to embrace the DIY spirit and take control of your environment. Keep that small notebook handy for your next project, stay curious, and remember that you are more capable than you think. Happy fixing!
Frequently Asked Questions
Is it safe to use chemical drain cleaners if I've already tried the natural baking soda and vinegar method?
Honestly, I’d be really careful there. Since you’ve already poured baking soda and vinegar down the drain, adding harsh chemical cleaners can be risky. Those chemicals can react unpredictably with the residue left behind, sometimes creating heat or even toxic fumes. If the natural route didn’t do the trick, I’d suggest reaching for a plunger or a drain snake next. Let’s try to keep it safe and mechanical before we bring out the heavy chemicals!
How can I tell if the clog is just in the P-trap or if it's a much bigger problem deeper in my pipes?
That’s the million-dollar question, isn’t it? Here’s how I figure it out: if the clog is just in the P-trap, you’ll usually see water backing up only in that specific sink or tub. But if you notice multiple drains slowing down at once, or if you hear gurgling sounds coming from your toilet when you run the shower, that’s a huge red flag. It means the issue is deeper in your main stack, and you might need a pro.
Are there specific tools I should invest in if I want to avoid calling a plumber every time a sink gets slow?
Honestly, you don’t need a professional-grade toolkit to save yourself a hefty plumber’s bill. If you’re serious about tackling these yourself, I’d suggest investing in a decent quality sink plunger and a flexible drain snake—the manual kind is much easier to control than the electric ones. I also keep a reliable pair of heavy-duty gloves and some penetrating oil on hand. Having these basics ready makes a “disaster” feel way more manageable!