I still remember sitting on my floor in my first tiny apartment, surrounded by a chaotic mountain of mismatched fabric scraps and a sewing machine that felt more like a complicated piece of heavy machinery than a creative tool. I had spent way too much money on a “complete starter kit” that promised instant mastery, only to realize I didn’t even know how to thread the needle without getting frustrated. If you’ve ever felt like you need a degree in engineering just to tackle the sewing basics for beginners, I promise you’re not alone—and you definitely don’t need a massive budget to get started.
I’m not here to give you some flowery, unrealistic lecture on “finding your inner artist.” Instead, I want to give you the real-world toolkit I wish I had when I was starting out. We’re going to strip away the intimidation and focus on the practical, hands-on skills that actually matter for your first few projects. My goal is to help you move past the overwhelm so you can start building things with your own two hands, one stitch at a time.
Table of Contents
- Building Your Confidence With Beginner Sewing Kit Essentials
- Mastering the Machine How to Thread a Sewing Machine
- 5 Pro-Tips to Keep Your Sewing Projects from Turning into a Total Mess
- Quick Wins to Keep Your Sewing Momentum Going
- Finding Your Flow
- You’ve Got This: Your Sewing Journey Starts Now
- Frequently Asked Questions
Building Your Confidence With Beginner Sewing Kit Essentials
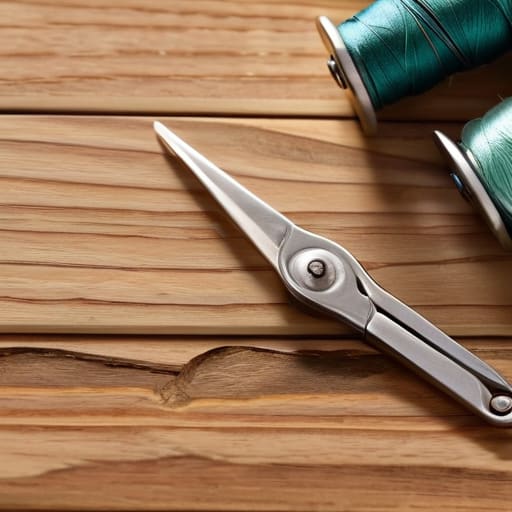
Before you dive into a massive project, you really need to get your hands on some beginner sewing kit essentials that won’t break the bank. I remember my first time trying to fix a hem, and I felt so lost because I didn’t even have a decent pair of fabric shears! You don’t need a professional studio, but having a reliable set of seam rippers, a few different needle sizes, and some high-quality thread will save you so much frustration. Think of it like setting up a new dev environment; if your tools are clunky or broken, you’re going to spend more time fighting the gear than actually coding—or in this case, creating.
Once you have your kit, the real magic happens when you start practicing basic sewing stitches for beginners. Don’t feel like you have to master a complicated embroidery pattern right away. Just start with a simple straight stitch on some scrap fabric. It’s all about building that muscle memory. If you hit a snag, don’t panic; even seasoned pros deal with tension issues or bird-nesting thread. Just take a breath, grab your notebook, and troubleshoot it step-by-step.
Mastering the Machine How to Thread a Sewing Machine
I know, I know—staring at a tangle of colorful threads and tiny metal levers can feel a bit like looking at a piece of legacy code without any documentation. It’s intimidating at first! But honestly, learning how to thread a sewing machine is just like debugging a simple script; once you understand the logic of the path the thread needs to take, it becomes second nature. Start by finding your manual (or a quick YouTube video of your specific model) and follow the sequence step-by-step. Most machines have numbered guides that show you exactly where to loop the thread, from the spool pin down to the tension discs.
The most important thing to remember is to never skip a step. If you miss even one tiny guide, you’re going to deal with a lot of frustrating bird-nesting under your fabric. Once you’ve successfully routed the thread through the tension assembly and the take-up lever, make sure you thread the needle from front to back. If the machine isn’t behaving, don’t panic—most sewing machine troubleshooting tips boil down to simply re-threading everything from scratch. It’s a total rite of passage!
5 Pro-Tips to Keep Your Sewing Projects from Turning into a Total Mess
- Don’t skip the ironing—and I mean actually ironing, not just pressing. Using an iron to press your seams flat after every single stitch is the secret difference between a project that looks “homemade” and one that looks professional. It’s a game-changer for your finished look.
- Embrace the seam ripper like your best friend. Look, I’ve spent more hours unpicking stitches than I’d like to admit, but even the pros mess up. Don’t get discouraged when a seam goes wonky; just rip it out, laugh it off, and try again. It’s all part of the learning curve.
- Always, always, always use the right needle for your fabric. Using a heavy-duty denim needle on a delicate silk blouse is a recipe for puckered seams and a massive headache. Take a second to match your needle type to your material—your sewing machine (and your sanity) will thank you.
- Slow down your foot pedal. When you’re first starting out, the urge is to just floor it and get it over with, but sewing is much more about control than speed. Think of it like driving a car in a parking lot; you want steady, predictable movements so you don’t end up veering off into the fabric.
- Test your stitch on a scrap piece first. Before you commit to sewing that beautiful new fabric you just bought, take a small leftover scrap and run a few lines of stitching. It’s the easiest way to check your tension and make sure your settings are dialed in exactly how you want them.
Quick Wins to Keep Your Sewing Momentum Going
Don’t sweat the small stuff—if your first few stitches look a little wonky, that’s totally normal and just part of the learning curve.
Invest in a few decent quality basics early on so you aren’t fighting against subpar tools while you’re trying to find your rhythm.
Focus on mastering the machine’s mechanics first, because once you stop worrying about the threading, you can actually start having fun with the creative side.
Finding Your Flow
“Don’t get too caught up in making every single stitch perfect right out of the gate. Sewing is a lot like debugging code—you’re going to hit a few snags and unravel a few seams, but that’s exactly how you build the muscle memory and the confidence to create something truly awesome.”
Sarah Mitchell
You’ve Got This: Your Sewing Journey Starts Now
We’ve covered a lot of ground today, from gathering those essential kit basics to finally conquering the intimidation factor of threading your machine. I know it can feel like a lot to take in—honestly, even when I first started upcycling old furniture, I felt that same “where do I even begin?” overwhelm. But remember, once you have your tools organized and you understand the mechanics of your machine, the hardest part is actually behind you. You aren’t just learning to move a needle through fabric; you are building the foundational technical skills that will allow you to execute almost any DIY vision you dream up.
My biggest piece of advice? Don’t aim for perfection on your first try. Your first few seams might look a little wonky, and your tension might be slightly off, but that is exactly how learning happens. Think of it like writing your first line of code—it’s rarely perfect, but it’s a crucial stepping stone to something great. Grab that fabric, sit down at your machine, and just start creating. I am so excited to see what you make, and I promise that every little mistake is just more data helping you become a better maker. Now, go out there and get stitching!
Frequently Asked Questions
I've got my machine and my kit, but what kind of fabric should I actually start with so I don't get frustrated?
Honestly, the biggest mistake I see people make is jumping straight into something tricky like silk or stretchy jersey. Trust me, you’ll just end up frustrated. Start with some stable, medium-weight cotton—like a basic quilting cotton. It doesn’t slip around under the presser foot, it’s easy to iron, and it actually behaves the way you expect it to. Think of it like learning to code: you want to master the syntax before you try building a complex app!
Is it worth investing in a really expensive sewing machine right away, or should I stick to something basic while I'm still learning?
Honestly, save your money for now! I see this all the time in tech, too—people want the top-of-the-line setup before they’ve even mastered the fundamentals. For sewing, a fancy machine with fifty different decorative stitches is just going to overwhelm you. Stick to a reliable, mid-range mechanical machine. It’ll teach you the core mechanics without the steep learning curve (or the massive price tag) of a high-end computerized model.
How do I actually read those confusing patterns without feeling like I'm staring at a different language?
I totally get it—staring at a pattern for the first time feels like trying to debug a massive codebase without any documentation. It’s overwhelming! My best advice? Don’t try to read it all at once. Start by scanning the “Instructions” and “Cutting Guide” sections first. Think of them as your project requirements. Once you understand the goal and the materials needed, the weird symbols and notations will start making way more sense.
